Mounting fake cameras on brick requires specialized hardware like weatherproof brackets and high-strength anchors to prevent damage from elements or theft. Key steps include cleaning the wall, marking pilot holes, and securing brackets with a brick drill bit. Precise positioning at eye level or slightly elevated ensures clear coverage, while regular testing and maintenance ensure optimal performance.
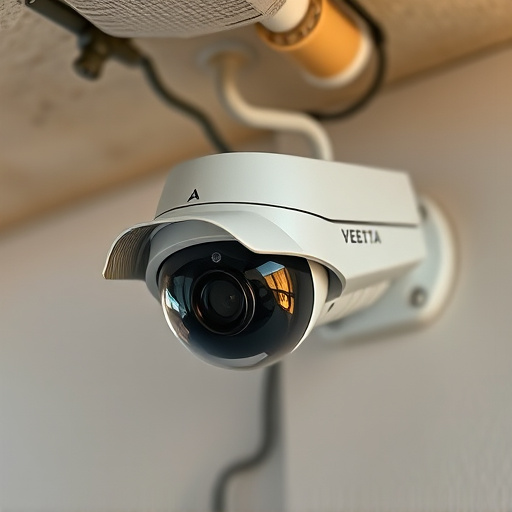
Mounting fake security cameras on brick walls is an effective way to enhance home or business security without drawing attention. This comprehensive guide delves into the essential aspects of installing these disguised cameras, from understanding the unique requirements of brick surfaces to choosing robust mounting hardware for longevity. We’ll walk you through a step-by-step process, ensuring optimal positioning and angle adjustments for maximum visual coverage. Learn how to test and maintain your hidden security system for enhanced protection.
- Understanding Fake Camera Requirements for Brick Walls
- Choosing the Right Mounting Hardware for Durability
- Step-by-Step Guide: Attaching Cameras to Brick Surfaces
- Positioning and Angle Adjustments for Optimal Vision
- Testing and Maintaining Your Disguised Security System
Understanding Fake Camera Requirements for Brick Walls
Mounting fake security cameras on brick walls is a bit different from other surfaces due to the wall’s structure and material. Understanding the requirements for this specific task is crucial before beginning installation. Brick walls require sturdy, weatherproof mounting brackets designed specifically for their weight and texture. The brackets should have adjustable features to accommodate various camera sizes and angles while ensuring a secure fit.
When selecting mounting hardware, consider the camera’s dimensions, weight, and the type of brick used in your wall. Different brick compositions may necessitate specialized brackets with enhanced grip mechanisms. Additionally, sealing the mounting points is essential to prevent moisture ingress, which can compromise both the camera’s functionality and the brick’s integrity over time.
Choosing the Right Mounting Hardware for Durability
When installing fake security cameras, particularly on brick surfaces, selecting the appropriate mounting hardware is paramount for long-term durability and reliability. The weight and size of the camera, combined with environmental factors like wind and rain, require robust fasteners to prevent damage or dislodgement. For brick walls, consider using high-strength anchor screws designed specifically for masonry, along with sturdy metal brackets. These ensure a secure hold, protecting your investment from potential theft or weather-related issues.
Choosing hardware compatible with the camera’s weight class and installation instructions is key. Some mounting kits come with adjustable braces and locking mechanisms for added stability on uneven surfaces like brick. Always follow manufacturer guidelines for the best results, ensuring your fake security camera system offers peace of mind and the protection you intended.
Step-by-Step Guide: Attaching Cameras to Brick Surfaces
Attaching cameras to brick surfaces requires a few simple steps and the right tools for a secure installation. Start by selecting robust mounting brackets designed specifically for brick walls. These brackets should have sturdy screws and anchors that can penetrate the brick’s surface. Next, clean the brick wall to ensure there’s no debris or dirt present. Use a brush or cloth to remove any residue, especially if the area has been previously painted.
Position the camera mount at the desired location, marking the spots where you’ll drive in the screws. Drilling pilot holes is crucial; it prevents the brick from shattering and ensures the brackets’ stability. Once marked, attach the brackets using a drill with a suitable bit for brickwork. Tighten the screws securely, but be mindful not to overtighten, as it could damage the brick or distort the camera’s alignment.
Positioning and Angle Adjustments for Optimal Vision
When mounting fake security cameras on brick, positioning and angle adjustments are crucial for optimal vision. The camera should be placed at a height that offers a clear view of the area you want to monitor, typically around eye level or slightly elevated. This ensures a comprehensive field of view without obstructions from nearby structures or foliage.
For the best results, align the camera’s lens parallel to the ground for wide-angle coverage. If your fake security camera has adjustable brackets, use them to tilt the camera slightly downward to prevent any blind spots. This adjustment is particularly important when monitoring entry points like doors or windows, ensuring no angle goes unseen.
Testing and Maintaining Your Disguised Security System
After installing your disguised security cameras, it’s crucial to test and maintain your system for optimal performance. Start by verifying that each camera is capturing clear images and recording videos effectively. Check the connections and ensure all cables are securely fastened, especially when mounting fake cameras on brick surfaces. Proper placement and a sturdy mount are essential to prevent tampering and ensure the longevity of your security system.
Regular maintenance includes cleaning the lenses to avoid dust or debris buildup, which can degrade image quality. Keep an eye out for any signs of damage or misalignment and make adjustments as needed. Testing at different times of the day, including low-light conditions, will help you understand the capabilities of your system. Remember, a well-maintained security camera network provides better protection and peace of mind.
Mounting fake security cameras on brick surfaces is a cost-effective way to enhance home or business security. By understanding the specific requirements for brick walls, selecting robust mounting hardware, and following a detailed installation process, you can create an effective disguised security system. Regular testing and maintenance ensure its longevity and optimal performance. Remember, proper positioning and angle adjustments are key to achieving maximum visibility without compromising aesthetics.